Tomorrow's rain date won't be needed for
Judy Tobie's papermaking workshop. Today was as perfect a day as you could want for such a venture: sunshine, and not too sticky hot. My daughter and I showed up with several other people to literally dip our hands into this intriguing medium.
 |
| Judy Tobie, workshop teacher |
Judy had set up long tables on the lawn with blotter cloths on them for each workshop participant to work at, and other tables over a gravel area. On them were big plastic tubs, each filled with a pigmented paper pulp dispersed in water.
 |
| Drying paper (l.) & pulp still inside deckle (r.) on cloths |
She showed us how to hold the deckle frame and framed screen together to dip in the pulp. Then we drained some of the water off, carried it to our table, lifted the deckle off and applied the screen to a piece of sheet (a "felt") layered over the chamois. After lifting the screen and blotting the paper with a sponge, the paper was ready to either dry or to apply interesting items to and sandwich them under more paper layers.
 | | |
| Some workshop participants blotting their paper. |
|
|
|
|
|
|
|
|
|
|
As we got the hang of this it was hard to stop for the break when Judy brought out a beautiful and delicious summer lunch to enjoy beneath the shade of a tall bamboo stand.
Our afternoon lesson was on making a simple shaped bowl form, much the same way you'd make a draped form with clay.
 |
| Shaping a bowl from paper pulp. |
Since I've done work with clay for years, I was constantly comparing that medium to this as I worked. Both are sufficiently messy that a special type of indoor studio space is warranted if one can't work outside. Both (especially wheelthrowing clay) use a significant amount of water during the process. Both give you options for embedding textures. Although the papermaking set up seems simpler, a serious artist might feel the need for some costly tools like a beater and a drying machine, and of course the ceramic artist needs at least a kiln to fire their finished creations.
Once the drying paper sheet is lying on the felt it can be moved onto a larger flat screen or just onto the grass to dry in the sun.
 |
| New paper sheets drying on cloths. |
My daughter worked on a circle theme with the intention of making them pages of a book:
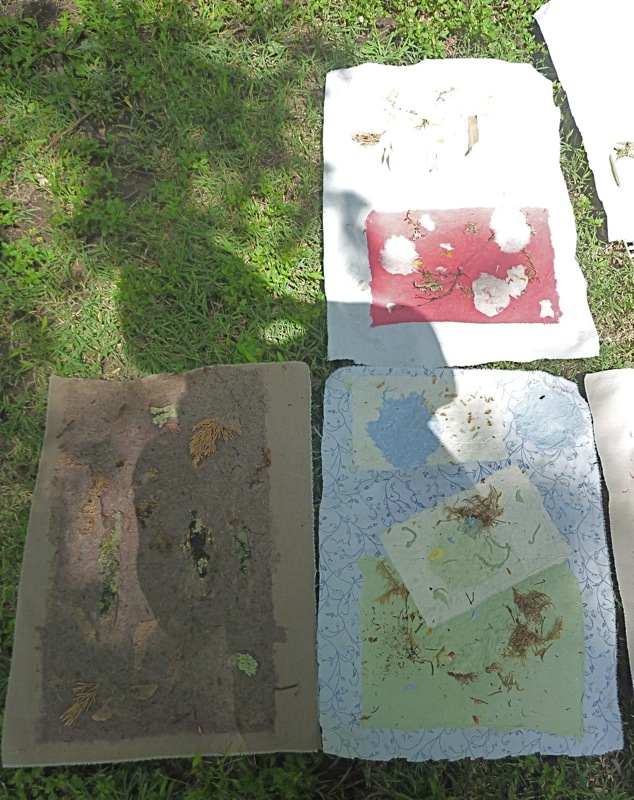
I added pieces of bark, dry bamboo leaves, flower petals, twigs, etc. into my paper, experimenting with attaching them but not completely covering them in additional pulp layers. As the day went on I got much more daring in my additions, applying significant pieces of bark and tall grasses to the paper. As is so often the case with workshops, just as I got to feeling like things were really cooking, it was time to clean up.
 |
| My papers on felts, drying on the lawn. |
 |
| Papers finishing drying on a screen on the floor in my studio. |
Right before we came home I quickly rounded up the bits of stray pulp we'd pulled off the deckle frames and I rolled them into colorful beads. Paper jewelry! Yet another use for this versatile medium!
 |
| Paper beads drying out. |
The trickiest part of the day was fitting all of our creations into my car, keeping them flat and not stacking them for the drive home. Now our dining room table and chairs, and my studio floor are covered with them now until they dry enough to lift off the cloths and store. The main thing paper and ceramic artists need? Lots of space!
I'll look forward to a chance to participate in another papermaking workshop. There is so much more to explore!


No comments:
Post a Comment